UT3: Texture importing with the correct settings
This tutorial will cover the basics of importing textures, what settings they should have applied to them and why.
Importing:
Unless there is an alpha layer, all textures should be saved out in 24-bit TGA format.
Open up the 'General Browser Window' within UT3 and click on 'File/Import', direct yourself to the directory your texture is located and click 'Open'.
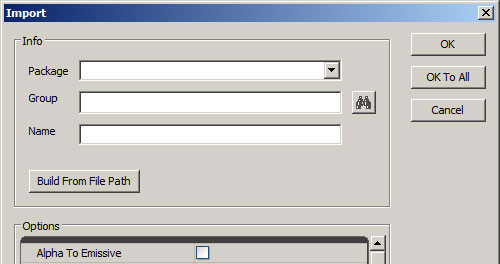
'Package' refers to package it will be saved as, and the group it will be displayed in.
'Group' refers to the sub-category with in the package.
'Name' refers to what the mesh will be called within the group.
(Note), when re-importing any mesh due to a tweak (UV, geometry); if you have the proper package and group selected, UT3 will automatically fill in those sections. Also, if you give it the same name as the old mesh, it will over write it, and plug each material into the correct slots. If you change the material order, or add another one, you are at risk of messing up the numbering order the materials should be applied to, sometimes resulting in un-wanted grouping.
The settings you have under 'Options' should be changed as you import each texture depending on the type that it is, but for now just hit 'OK To All' so we can see why these should be changed. These settings can be changed easily in the 'General Browser', do don't worry if you hit 'ok' by accident when you didn't want to. In the future you should change these as you import them to make sure you don't forget to later on.
Tweaking:
Find the package and group where you saved the textures and double click on one. By default, each texture should look like this.

The diffuse is the only texture where you don't really need to change any settings. Depending on if you have an alpha or not, there are other settings above to cope with compressions, but for now, let’s focus on everything below 'Compression Settings'.
Open up your normal map and change it to match these settings.

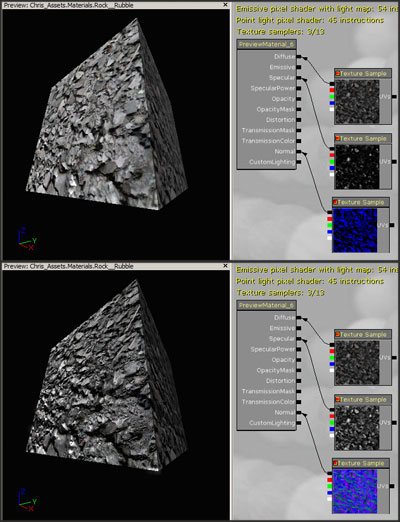
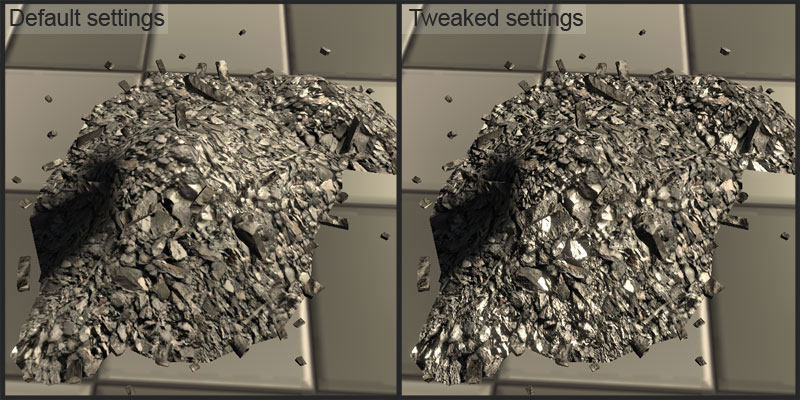
The top image is the material with the default texture settings. Once you change the normal settings, you notice a lot more depth. You may notice the spec has changed as well. Since the spec is grey scale, I turned off the 'SRGB' setting. This will change the strength of the spec, but it was a bit weak to begin with, so it's not a big problem in this case.
You will notice a change in the coloring of the texture as soon as the changes are done. Without these changes, your normal map will not look correct.
As you can see, these simple setting changes can make your normal map work.
I hope this little tutorial has helped you out. i thank you for your time.