UDK – Unreal Development Kit
Mist or Fog tutorial
Here is a video to show the functionality of the shader in a scene. To make the effect easier to see, it has been sped up 4 times, so for me, the end result is much more subtle. enjoy.
This shader consists of a single texture which is added, multiplied and 'bump offset' in different ways to give this effect.
Here is an image of the shader itself so you can have a basis to follow the tutorial.

First off, we will need a texture to work from. As i stated in a previous tutorial, when i want to make a 'cloud' i use the 'cloud' filter in photoshop. Usually photoshops are a TERRIBLE thing to use, but when dealing with clouds, this gives a effect that will work just fine. This is an image of the texture i will be using.
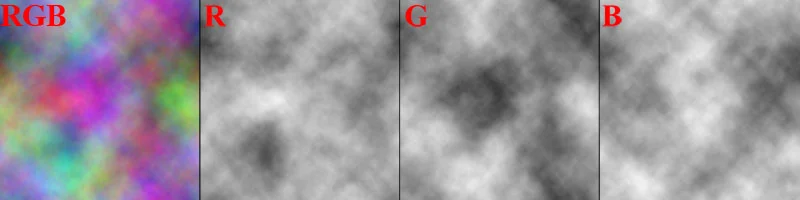
The far left image is a combination of 3 different cloud textures. Each cloud texture takes up a different RGB channel, this will allow you to have 3 different texture options in a single texture.
First i need to talk a bit about what geometry this shader will be applied to. If you want this to be placed directly over top of geometry, you can either duplicate geometry and scale it up, but since this will be a single floowing 'fog/mist' shader, the UV's have to be laid out in a way so they're fully connected. What i mean by this is so there are no breaks in the UV layout, otherwise you'll have obvious visual gaps.
Secondly i need to talk about the texture density that it needs to be. If you will be placing this on a flat BPS plane, the UV's can be scaled directly in the editor, however if you are creating geometry in an exterior program (maya, max) you might hace some 'back and forth' to get it looking how you want it to be.
For this example, i have a simpl polygon plane with the UV's scaled to the size i want. If your UV's are different than mine, the end result will not look quite the same in the end.
ok. we need to set up a very simple shader with animated clouds to see which direction and speed we want the fog/mist to travel based on the UV layout.

this is a simple simple shader. two textures with a panner node applied to each of them and a 'tex coord' to change the scales. The green channel of one is plugged into the A channel of an 'add' node, and the red channel is plugged into the B channel of the same 'add' node. This is then plugged into the diffuse.
this is the result that we get. a fairly flat, non distorting animated texture.
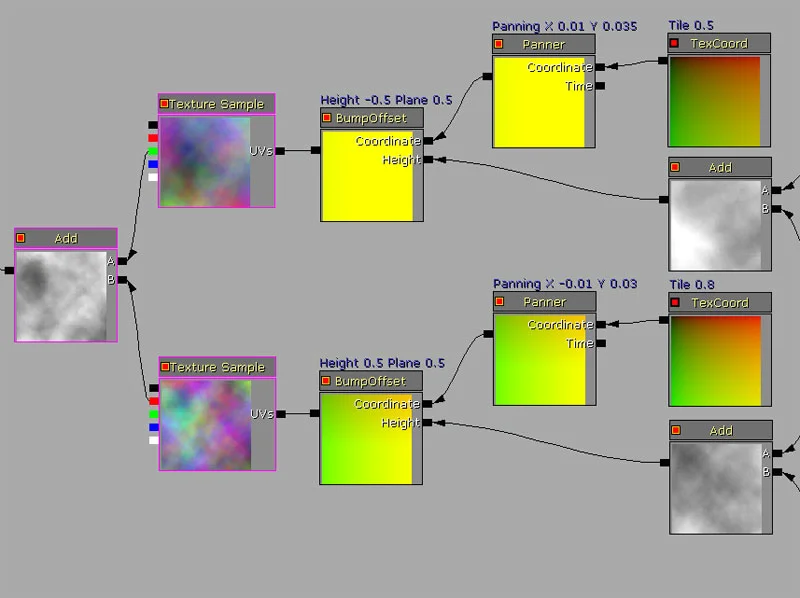
Now we need to add 'variation' in it. to do this, we will need to place the same 4 more cloud texture into the scene set up the same way we just set up the previous cloud. two cloud textures, with different panning and a 'tex coord' set to 0.3 0.35 0.4 and 0.45. the panning needs to be slightly faster than the original cloud textures so there is an obvious distortion.
Here is a close up of this section of the shader and the variables used.

Each of these 'add' nodes need to be plugged into a 'bump offset'
This is what that effect gives.
What this now needs is to be transparent. if you click on the root material and change the 'blend mode' to 'Blend_Additive', it will then cause any black value to be transparent, and the white is visible.
to add move contrast, if you connect the 'add' to the 'base' node of a 'power' node with a 'exponent' of 1.5, it will tighten the contrast between white and black. The Power node then needs to be 'clamped' so no values with be higher than 100% white.
This is what this section should look like.

Now we need to create the 'alpha' aspect of the shader. this will blend the transition where the mist/fog connects with any geometry, removing the hard edge it normally creates.
This is what that section should look like.

This will change the collision of the geometry from this:
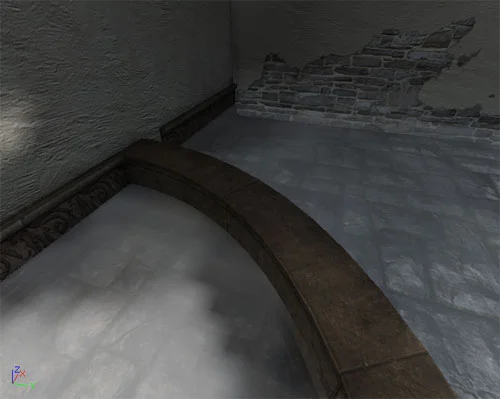
to this:

The seam is removed, and the visual quality of the mist/fog is where i want it to be.
There you have it. the shader is done.
I hope this little tutorial has helped you out. i thank you for your time.