Texture Density
Game Texture Density: This tutorial will cover whether it is always necessary to always use a 0 to 1 UV space for your UV’ing of assets. This does not apply to every engine, but in this case, i created this Trebuchet for UT3. I will cover the pros and cons for each UV'ing method used.
If you create an asset with all the UV’s in the zero to one UV space, some issues can arise. This example shows such an asset.
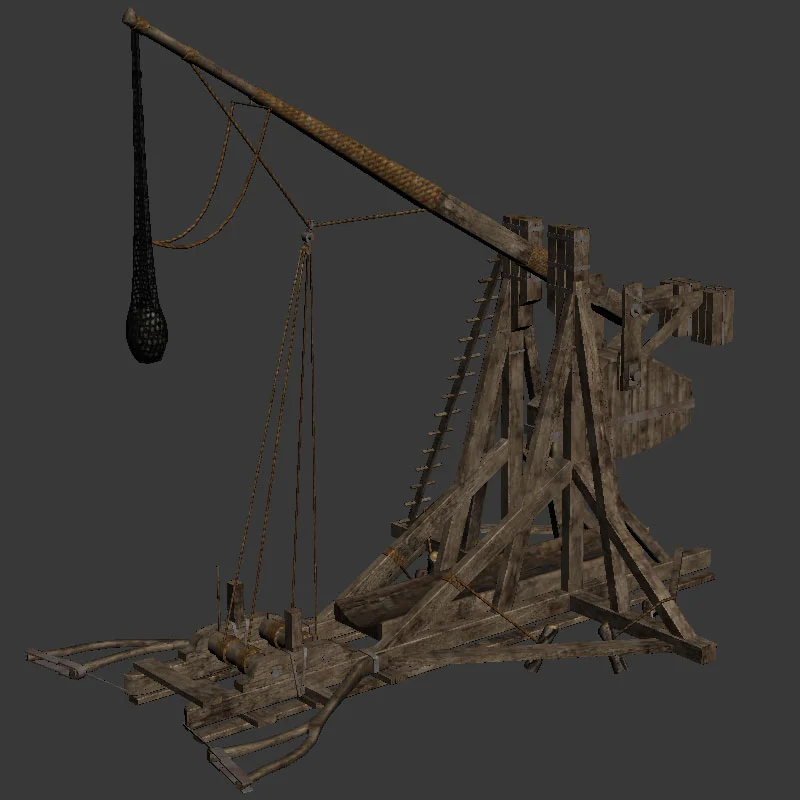
This asset from a distance looks fine. The image above is simply a screen capture the 3D Max scene, so normal maps, spec and lighting are not visible. What you see is simply the geometry and the base diffuse.
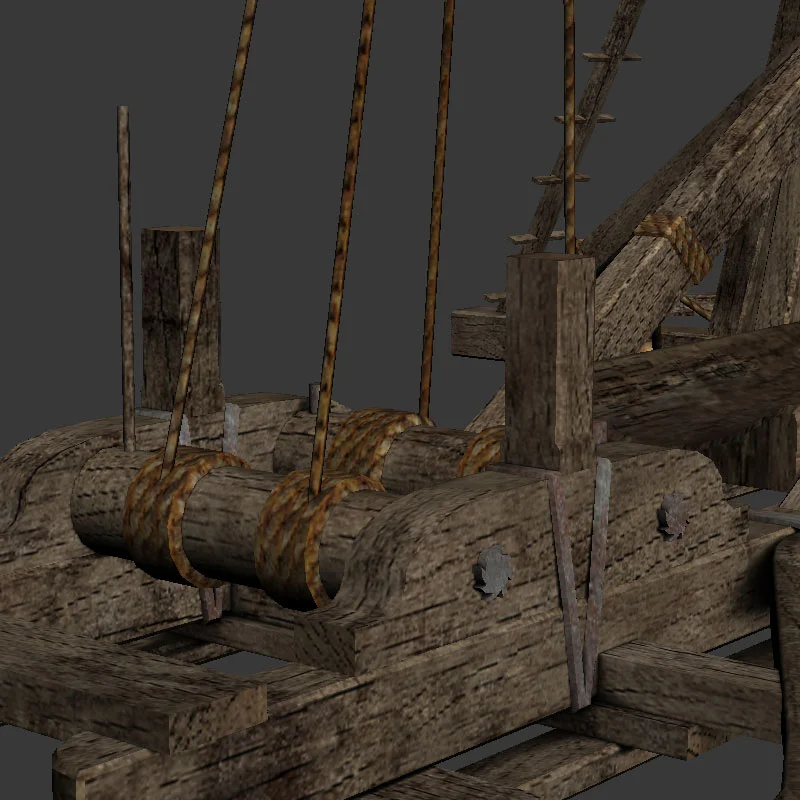
This image to the left is the UV’s of the Trebuchet shown above.
Every single piece has its own destinct space within the zero to one space with no over lapping what so ever.
This is extreamly handy for the simple fact that if your asset needs a lightmap baked in the editor, it is ready to be used.
If you will be using this UV layout for that purpose, you must concider the textures required for giving a good looking shadow, and the spacing between your UV’s to allow for bleeding. Remember that no UV's can over lap.
As i mentioned earlier, from a distance this looks fine. With the UV’ing done this way, the ambient occlusion can be baked in directly to the diffuse, allowing for more realistic shadows, however, it all comes at a cost.
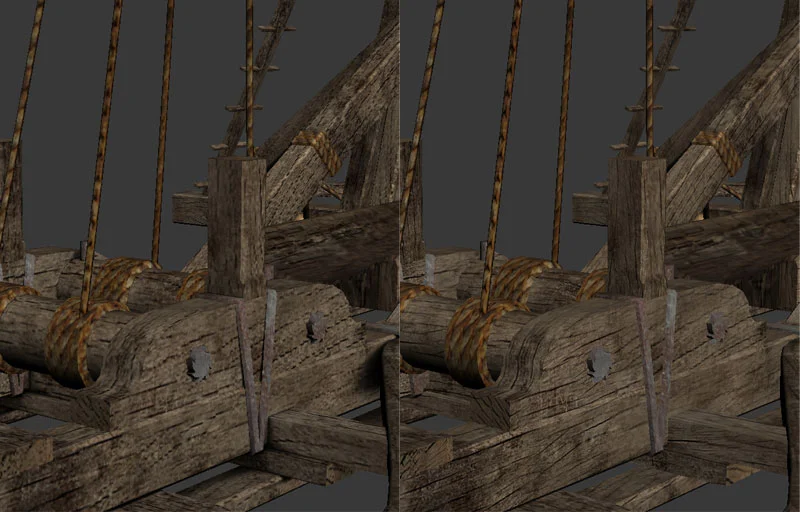
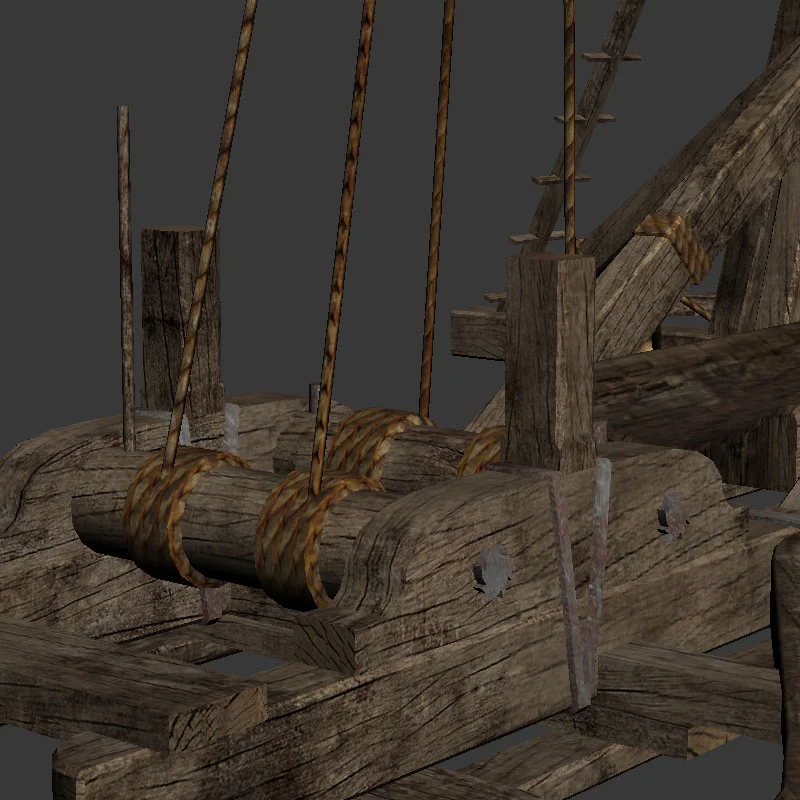
The image below is a close up of the asset at roughly eye-level. The diffuse used is a 2048X2048 texture, typically the max you should use for an asset. Terrain can use different texture sizes, and of course, depending on the engine you are using, there are different texturing methods, but for UT, try to keep everything at 2048X2048 and below.
0 to 1 UV space diffuse texture. Because the asset is so large, you do not retain enough quality in the texture to allow for realistic results. Typically UT should have a 512 for every 3 to 4 meters or so. (roughly the height of one floor.) Of course this size can varie depending on the engine and project you are doing, so be sure to ask your superviser which is best suited.
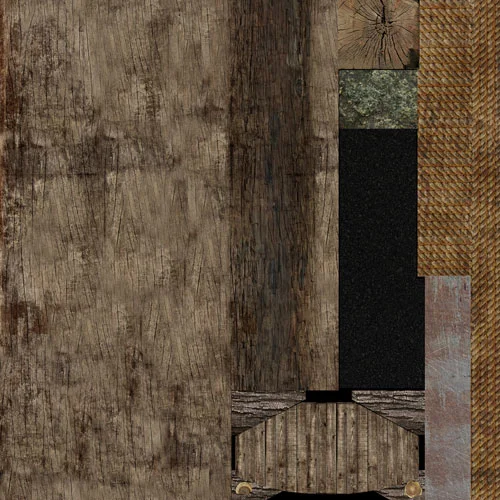
This image shows a much higher quality texture. The texturing method for this is MUCH more wild, but before i go into details about it, i must stress how important the 0 to 1 UV layout is.
Firstly, if you first create your UV’s within the 0 to 1 UV spac, you will have a UV ready for light mapping. Unreal can do it for you, but the results are no where near the quality an artist can do.
Secondly, you will have a UV which you can use for ‘masks’ on specific areas for the material editor (this will be covered in another tutorial)
Thirdly, you can bake out your ambient occlusion to this UV set.
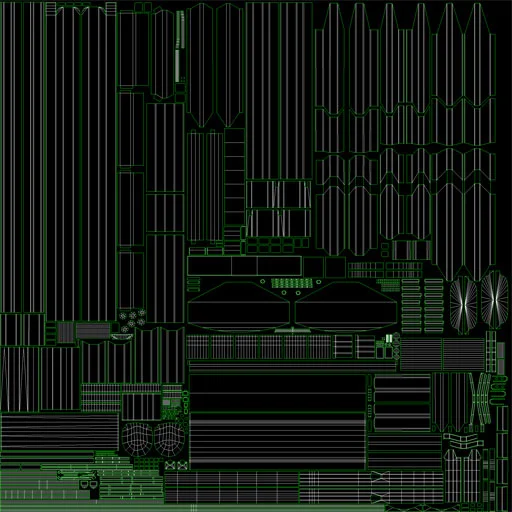
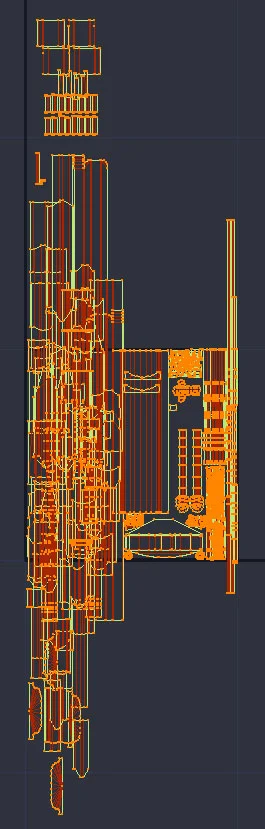
The image below is a screen capture within Max to illustrate how ‘kaotic’ it seems, but there is a structure to it.
This image shows a much higher quality texture. The texturing method for this is MUCH more wild, but before i go into details about it, i must stress how important the 0 to 1 UV layout is.
Firstly, if you first create your UV’s within the 0 to 1 UV spac, you will have a UV ready for light mapping. Unreal can do it for you, but the results are no where near the quality an artist can do.
Secondly, you will have a UV which you can use for ‘masks’ on specific areas for the material editor (this will be covered in another tutorial)
Thirdly, you can bake out your ambient occlusion to this UV set.
The image below is a screen capture within Max to illustrate how ‘kaotic’ it seems, but there is a structure to it.
Everything that looks ‘messy’ on the left is the larger wood areas, in the middle is the area where the ammo is dragged on, below that is the ‘counter weight’ and ‘tree stump braces’. The large black area is teh net (this is alphad out), the stone is above that and even above that is the ‘ends’ of the wood chunks. The right side holds the ropes and the metal.
Now, the advantage of texturing your asset this way is that you can get a MUCH sharper image wtih the same resolution of a texture, the down side is that you can’t bake out any specific textures to this to isolate a specific polygon face, Nor can you use a ‘corrective normal map’ (baked high poly to low poly normal map) since you have over lapping UV’s. That being said, there are ways around all of this.
Before we go any further, i can not stress enough how good it is to lay out everything in the 0 to 1 space. This will be required for the ambient oclusion and for the ‘lightmap’ lighting in unreal (unless this trebuchet will be animated that is). On top of that, it gives you a great starting place for laying out your UV’s and keeping everything even. If everything is uniform and even un the 0to1 space, then you just need to scale up your UV’s and move them around instead of scaling each one to fit each other. If you have un-even UV’s, you can have some very un-realistic and odd looking texture densities.
A good example of this is a screen shot from “The Lord of the Rings: The Battle for Middle Earth 2: Expansion Pack: The Rise of the Witch-King”
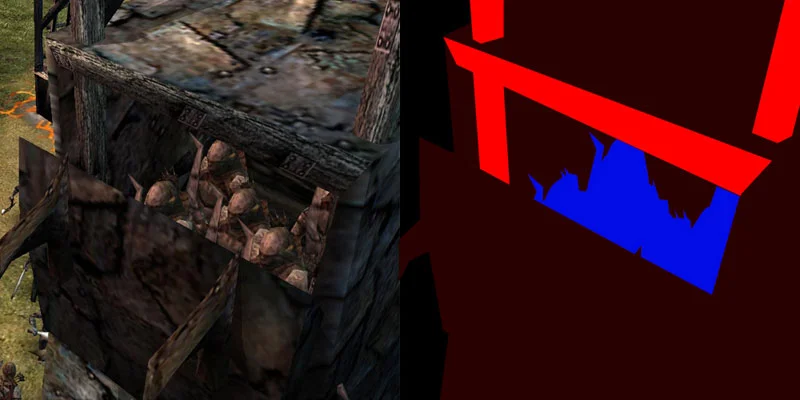
The image on the left shows a screen capture. The image on the right shows teh texture details. In games with characters, usually they are the main focus, so texture density does not always apply to them, but to unify the rest of the world with everything else (assets are built in pieces, and if they are not the same in style and detail, they will not fit with one another) then some areas of the game may just look strange.
The blue in this image represents the characters, so they can be ignored. The bright red represents the more detailed texture as where the dark red represents a less detailed texture. When you look at the image on the left, you can see blatently why it does not look right in the end result. This is why texture density is important.
This tutorial will be continued in another section which will cover how to optomize your materials and textures. I will show you how to have a single diffuse (2048X2048) a normal map (2048X2048) and a specular color, specular power and ambient occlusion (512X512). 3 textures instead of the traditional 4 2048X2048 textures.
I hope this little tutorial has helpd you out. i thank you for your time.