UT3: Creating an Escalator Material
In this tutorial i will cover one of many methods for creating an animated escalator inside UT3. This method will be using the materials esclusibely. A few steps are required for this to work correctly, and since there is a bit to cover in this tutorial, it might jump around a bit. Please remember that this tutorial can work for anything you wish to have animate. (water, rain, rope blowing in the wind). Some things will of course require minor tweaks here and there, but this should get you on the right track.
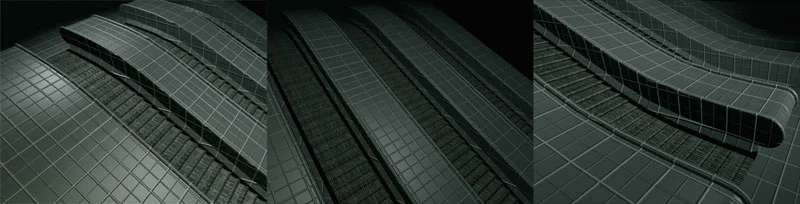
First i would like you to notice a few things about the escalator we have. You might be able to see them in the images above, but to make sure, take a look below at an over head shot of the escalators.

With this image, you can notice something very important for making this more believable. The camera is straight over the middle escalator, and everything seems to be straight and even, however the two on the sides of it seem to bump out in opposite directions. This is achieved by using the 'bump offset' node in the material editor. With this you will be able to create a fake distortion in your texture giving it the appearance of actually deforming as if it were constructed by geometry while in fact it is not.
One major problem with UT3 and the 'bump offset' is that it does not 'self occlude' (it is not a 'parallax occlusion)
http://www.youtube.com/watch?v=UeF-kCr_vyo .
What that means is that the shader does not hide itself, so at certain angles this might look strange. You will be required to experiment an awful lot for this to work how you want it to, and even then it might look strange. These are the types of things you need to be aware of before diving in.
First we need a model of course.
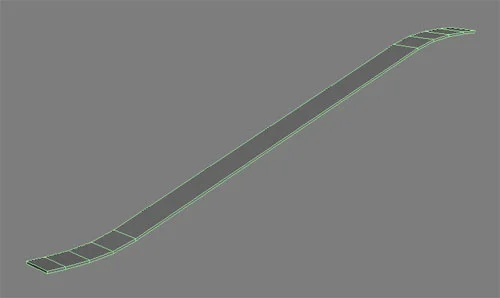
This is a VERY simple model. The only geometry is what's required to support the textures.
Next we will need a normal map for the 'platforms'. This was created by modeling a basic high poly model and baking it to a low poly.

The baking method is covered under my normal map tutorial, so if you are not sure how to do it, please read through that tutorial first. The reason i only used a flat plane is because the escalator itself is flat. Make sure that the UV's of the low poly are in the 0 to 1, and take up all the space. The reason for this is so you won't have to re-size anything inside Photoshop and risk changing the texture in an un-ideal way.
Next we will require another normal map, but this one is to 'fix' the normals of the slanted part. To

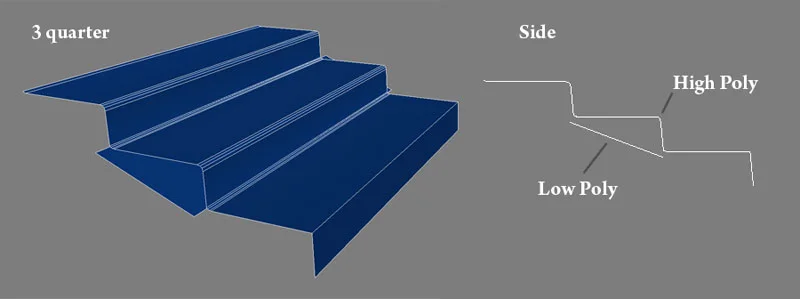
Illustrate this better, please take a look at the diagram below.
This image is a side shot of the escalator. The middle is a constant slope downwards, but each end has a slight transition to a level grade. What we need to create are two things. Firstly, the step height in the form of a normal map, and secondly, a black and white transition for both ends. Lets start with the stepping normal map.

This is the normal map it creates.
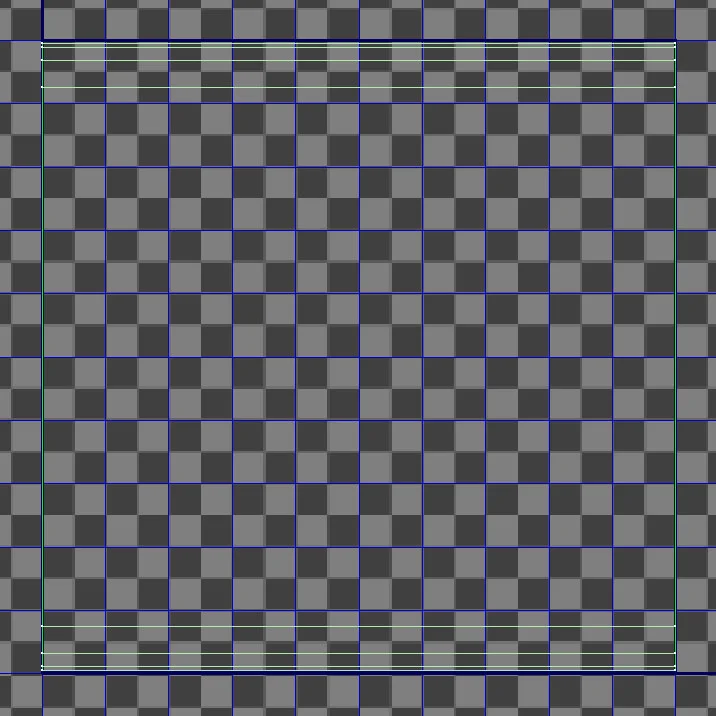
Next we need to create a texture that will be used for a mask to hide this bump when the texture is at the top of the escalator and when it reaches the base. To do this, lay out your UV's in the 1,0 space fully like so.

The next step is to create texture with a gradient from black to white for the 'bump offset', We also need to create a texture with white in the middle and black on the sides to alpha out the sides of the escalator. In creating these, since all the textures are black and white, you can combine them into the same texture to save memory.
Now we can go into unreal and start constructing the shader network. First you need to import the geometry and the textures. Remember to select 'TV_NormalMap' under “Compression Settings” when importing the normal maps otherwise they will not work.
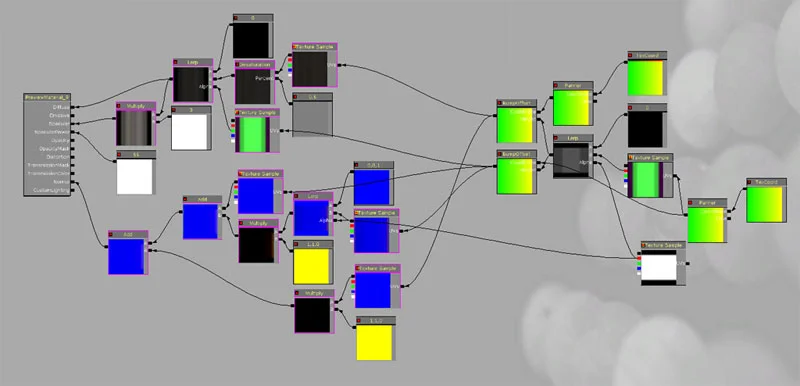
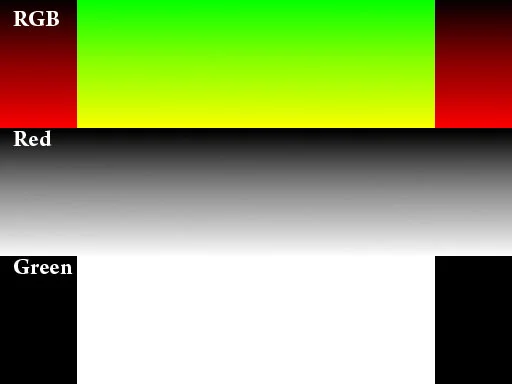
This is the material network. It is comprised of one diffuse, 3 normal maps and two mask textures.
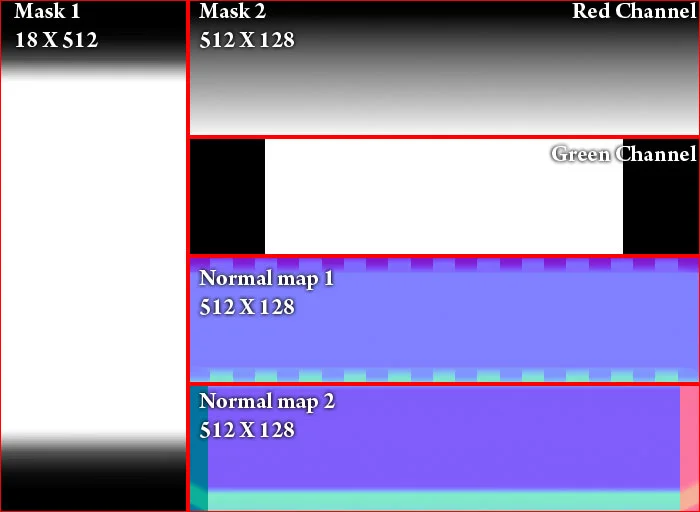
This is a break down of the textures we just created. Please note that 'Mask 1' was simply scaled horizontally to make it easier to see.
I used a matching normal map and diffuse texture already in one of my packages for the 'grate' look.
Please note that all setting can be changed depending on the size and length of your asset and the way the UV's were laid out.
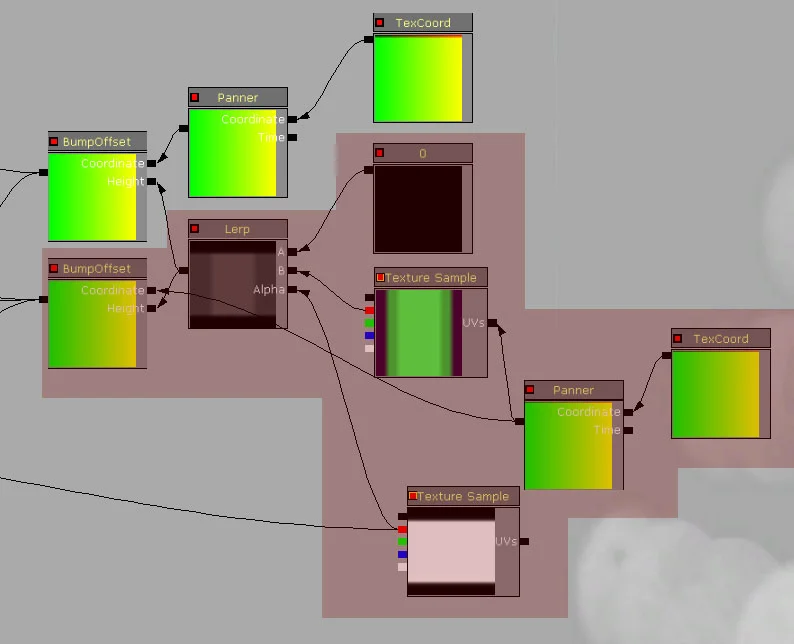
The 'texture coord' is repeated by (1. 75.)
This will then plug into the Panner which has a value of -3 for 'Speed Y'.
This will then plug into the “Mask 2” texture.
The red channel (this is for the displacement) will go into the 'B' channel of a Lerp with a 'Constant” of 0 plugged into the A.
Plug the 'Red' channel of 'Mask 1' into the alpha of lerp.
This then goes into the 'Height' of a 'Bump Offset' and the 'Panner' plugs into the 'Coordinate'.
The 'Bump Offset' has a 'HeightRatio' of 0.15 and a “ReferencePlane” of 0.1.
Since i am using an existing texture, i want it to repeat 1 third what the normal map does. To make sure the panning works correctly, i had to duplicate the 'Bump Offset', 'Panner', and the 'TexCoord'.
The original 'TexCoord' was set to 75 for the 'Vtiling', so a third of that is 25 for the new copy.
The original 'Panner' was set to -3, a third of that is _1 for the new copy.
The original Bump offset stays the same as the original, the reason for this is because you want it to offset the same amount, but the 'Coordinate' needs to be different.
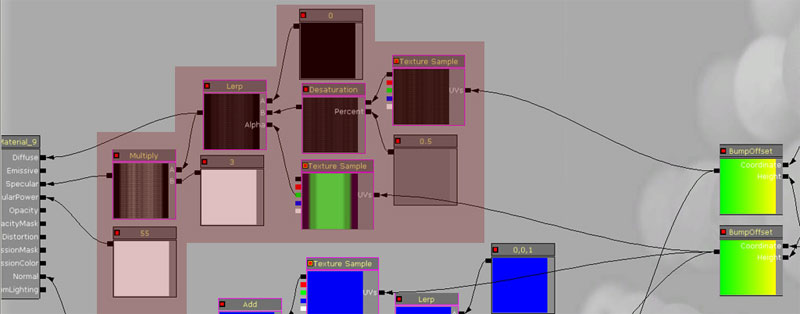
The copy of the 'bump offset' is plugged into the texture. I desaturated the texture by 50% since it was too 'loud'. This was then plugged into the 'B' channel of a Lerp with a 'Constant' of 0 in the 'A'. The green channel of 'Mask 2' is then plugged into the 'Alpha' of the 'Lerp'. Make sure the original 'Bump Offset' is plugged into the mask. Finally you can plug the 'Lerp' into the diffuse. To add a bit more brightness to the spec, i 'Multiplies' that lerp by a value of 3. The spec power is also plugged in with a value of 55.
Now for the Normal maps.
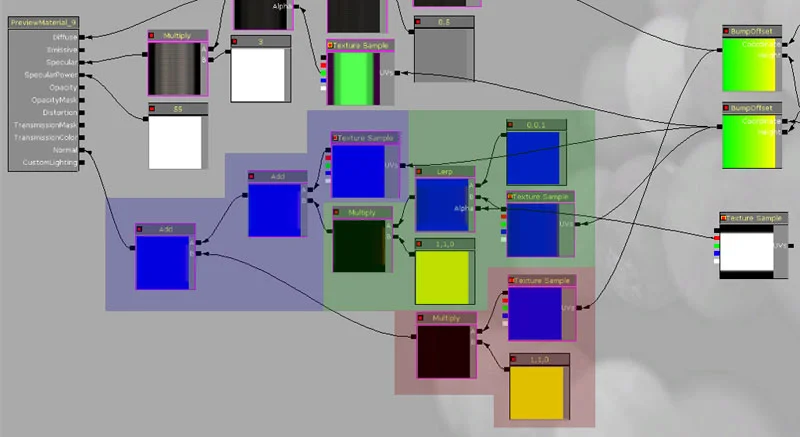
Red: This texture is the normal map that matches the diffuse already in the package. This has the 'copied' version of the 'Bump Offset' applied to its UV's.. I multiplied this by a 'Constant3Vector' with the values of 1, 1, 0. This is because it will be 'added' to the rest of the materials and i do not want the blue (Flat value) to copy over as well, only the height.
Green: This is the 'Normal Map 2' that gives the steaps their height. For this one we will plug in the original 'Bump Offset' into it. It is then plugged into the 'B' channel of a 'Lerp' with a 'Constant3Vector' set to 0, 0, 1 plugged into A. The reason for this is because 'Mask 1' is plugged into the alpha, and the black areas (the top and bottom of the escalator) need an bump value. Blue is by default flat, so a constant 3 vector of 0,0,1 gives it that flat value. Just like in the previous step, this is multiplies by 1,1,0.
Blue: The texture here is 'Normal Map 1'. This needs to have it's UV's attached to the original 'Bump Offset'. It is then 'Added' to the 'Green, and all of this is 'Added' to the 'Red'. The final result is the escalator, animated going up, or down, depending on the direction you give it. (in the panner)
I hope this helped you guys out.