Adding variation to a repeating texture pattern
This tutorial will cover a method used to hide the repeating pattern of a texture using the unreal material editor.
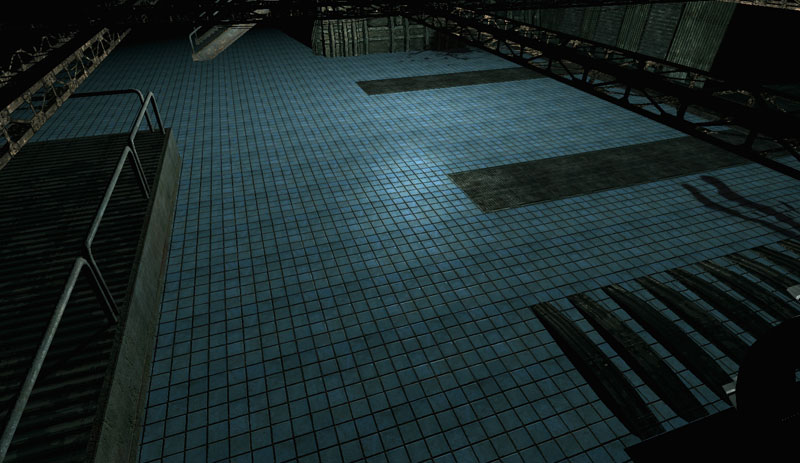
The image above is a before and after image of a texture for a floor. It is a little difficult to see the repeating texture, so if i repeat it 4 times, it will make it easier to see.
Here it is VERY easy to see the repeating, and yes, this could RUIN the believeability of a game, however, there is a way to hide this. First off, you will want to decrease any obvious color repeating (drastic change in color or saturation of a color based on the other colors of the textures). For now, i will keep this texture how it is and simply play around with the other textures we will be using.
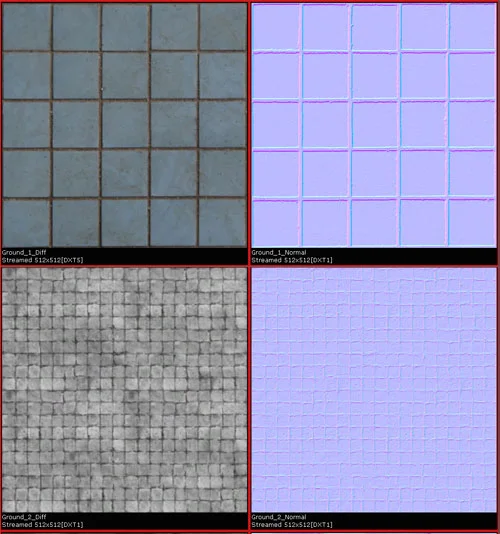
First off we will need the original textures used to create this. I will be using the diffuse as a specular texture as well as the diffuse, and a normal map is required as well. On top of that, i will need two other textures to add variation. To create this, i played around with a black and white version of the original diffuse texture, repeated it 4 times (if it was originally a 512X512 texture, it then became a 2048X2048 texture. Once it's created, we will down size it back to 512X512, making a texture like the original, but repeated 4 times. I then created a normal map from that)
These are the images i am using.
As you can see, the bottom two images are a repeating version of the top two versions. I over laid different 'repeating' textures to create a variation that we can use to change how these textures repeat.
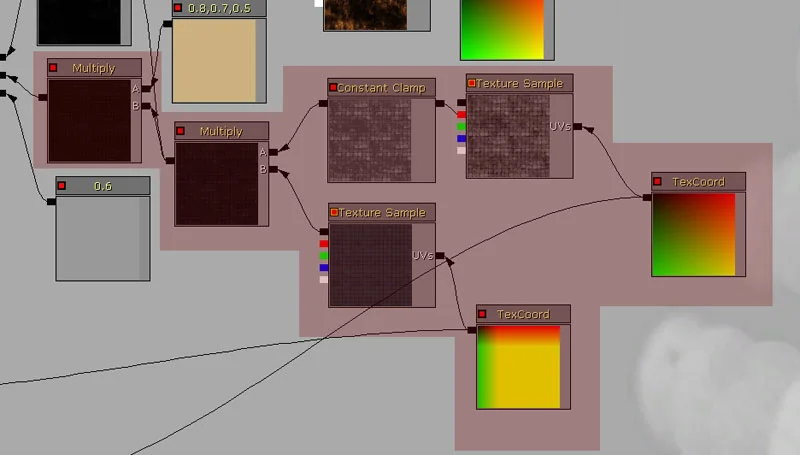
Here is a quick shot of the final shader. I will explain the steps and why certain nodes are being used.
Here is the break down:
1.
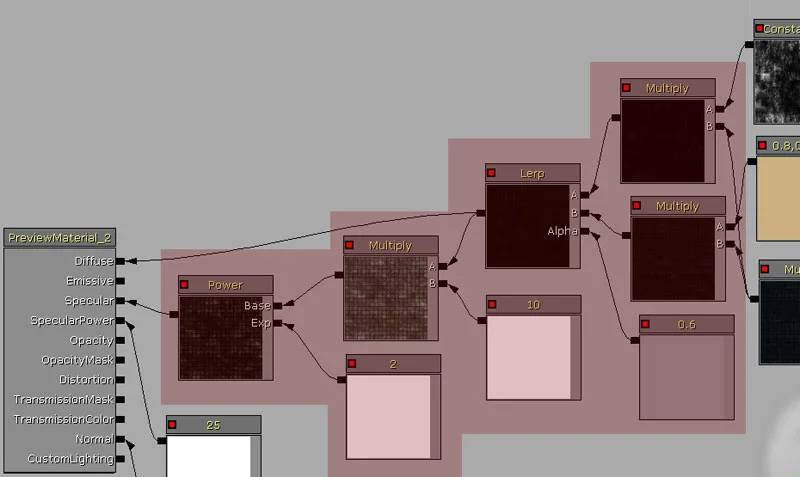
The multiply of them top 'Texture Sample' is 1/4th that of the lower 'Texture Sample'. The constant clamp is placed before the 'multiply' to clamp the black at a value of .25 (Clamp: Min - 0.025 Max – 1)
The multiply is then multiplied again by 'constant 3 vector' with the value of “0.8 0.7 0.5” to give it a slight colour change.
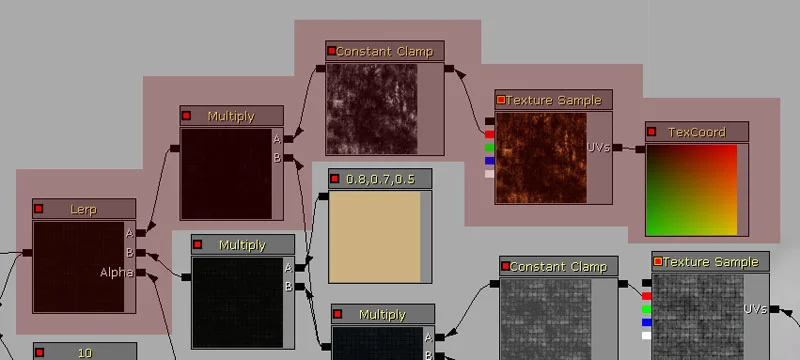
2.
The texture sample you see here can be any repeatable diffuse you want to add an aditional pattern noise to the shader.
The 'TexCoord' node can be whatever you want, this will depend on your asset and what it looks like in the end.
The constant clamp will be used to limit the 'dark' variation if it is needed.
A multiply is added between the original multiply adding the two previous textures discussed above and the texture we are currently working with.
Both the last multiply of the previous step and the multiply of this step is placed into the A and B channel of a Lerp node.
3.
In this step, the a constant variable is plugged into the Lerp node. This will blend evenly between the two multiply materials we have so far. That is then plugged into the Diffuse of the material.
The Lerp is then plugged into the multiply which is then plugged into a Power node. This is done to gain more contrast, so the colors get richer and sharper. This will then become the 'spec' texture.
Spec power is then set to whatever strength you'd like depending on your asset. For this one, it is set to 25 using a 'constant variable'.
4.
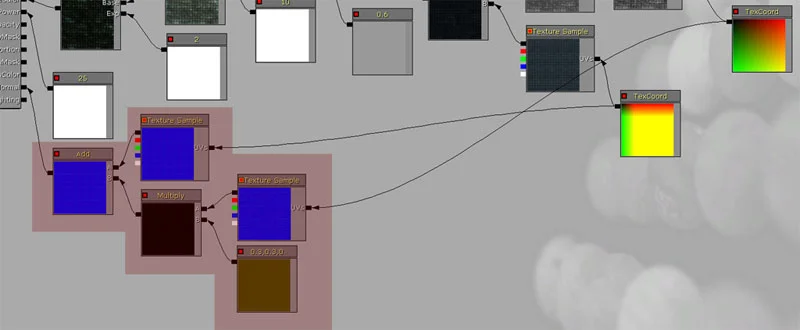
This step adds a variation normal map onto the existing floor normal map. This will add dents, creases, scuffs and other details that will add volume for the lights to play with. As shown in the image above (and covered in one of my other tutorials) this step is easy to set up. I will mention however that the ''Constant 3 Vector” is used because the three numbers correspond to the RGB value of the texture. The higher the number, the more powerful the normal map will be. The R and G numbers should be even with one another, but the B value should be set to 0 nearly every time. The reason for this is because the more 'blue' you add to the original normal map, the flatter it will become, there for losing the detail you originally had.
This is the final result. Some repeating is noticeable, but to fix this, tweak your diffuse textures to fit your desired look. Also, any grime layers you lay over this can be rotated slightly so they do not repeat along the same axis as the rest of your textures.
I hope this helped you guys out.

