UDK - Unreal Development Kit
Static Mesh Emissive Scene Lighting
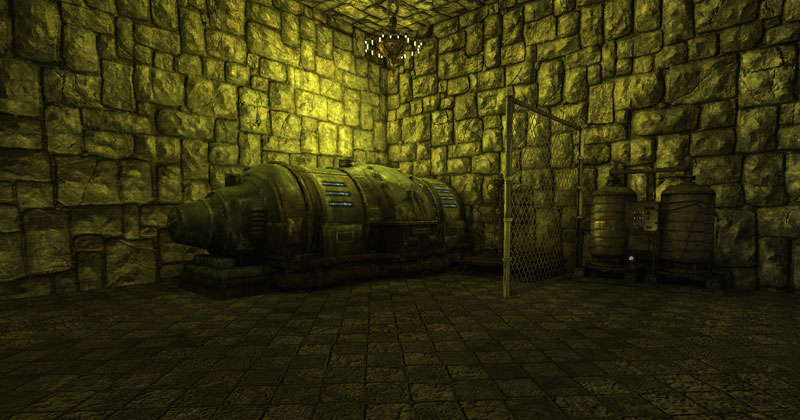
Emissive Lighting: Static mesh lighting the scen ethrough the emissive variable.
This tutorial will cover some basics for getting you started with Emissive light baking function inside UDK.
http://udn.epicgames.com/Three/DevelopmentKitBuildUpgradeNotes.html
Lightmass information can be found at this site
http://udn.epicgames.com/Three/Lightmass.html
Static Mesh Emissive lighting of scene:
Right off the bat, I must make it clear that Light maps do not animate when you bake them, so any material such as this engine I have been using will not cause the scene to 'pulse' or 'flicker' as the emissive part animates.
To get around this, place a point or spot light with the same animated rhythm in the desired area and set it up correctly. If you go to my 'animated clouds', the method is the same. This will 'animate' the lighting to suite the scene. That being said, if you DO have an animated asset, the emissive areas will still light the scene if you so wish.
To make this happen, it is as simple as check marking the 'Use Emissive For Static Lighting' button in your objects options menu shown on the left.
There are 5 options in this menu with the exception of 'use emissive' at the bottom.
Diffuse Boost: Scales the diffuse contribution of all materials applied to this object.
Emissive Boost: Scales the emissive contribution of all materials applied to this object.
Emissive Light Explicit Influence Radius: The default is 0, which means the influence radius should be automatically generated based on the emissive light brightness values greater than 0 override the automatic method.
Emissive Light Falloff Exponent: Direct lighting falloff exponent for mesh area lights created from emissive areas on this primitive.
Specular Boost: Scales the Specular contribution of all materials applied to this object.
Since this scene does not have a 'steady' emissive light source, i placed a chandelier in the scene to illustrate this better.
When i baked the scene, this is the result it gave me.
If we simply tweak the “Emissive Light Falloff Exponent”, it tightens the lights influence on the rest of the scene, giving a much more natural feel. The image below has had its 'falloff' bumped up to 10.
If your scene is not bright enough at the start, you can simply increase the value for “Emissive Boost' to pump up the strength of your light, Likewise, if it is too bright, you can use this to lower the strength as well.
If you choose to control how far off the lights will affect the scene, this is where the “Emissive Light Explicit Influence Radius” comes into play. This is the same scene with a value of 200 set for this 'Radius' option.
Combining the emissive intensity with the fall off and the radius will give you the desired result, it just takes time to play around and find out what works best.
BPS objects also support this functionality. If you go into the BPS options (F5), there is a new section called “Lightmap Settings”. The functions are the exact same as covered in static objects.
Each time you bake the scene, you will see an error message reading “No importance volume found”.
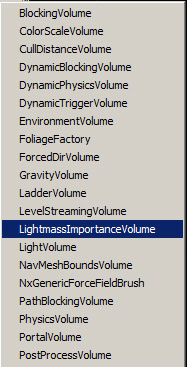
An “Importance volume” is a volume created using the 'brush' tool that instructs the engine where the most light detail should be baked too. Distant objects are of course less important (outside of game play area) so they can be outside of an 'important' volume.
To create this, select the brush and pick a size (this can be re-shaped later on). Right click in the “Add Brush” section and scroll down until you see “LightMassImporanteVolume”
I hope this little tutorial has helpd you out. i thank you for your time.


